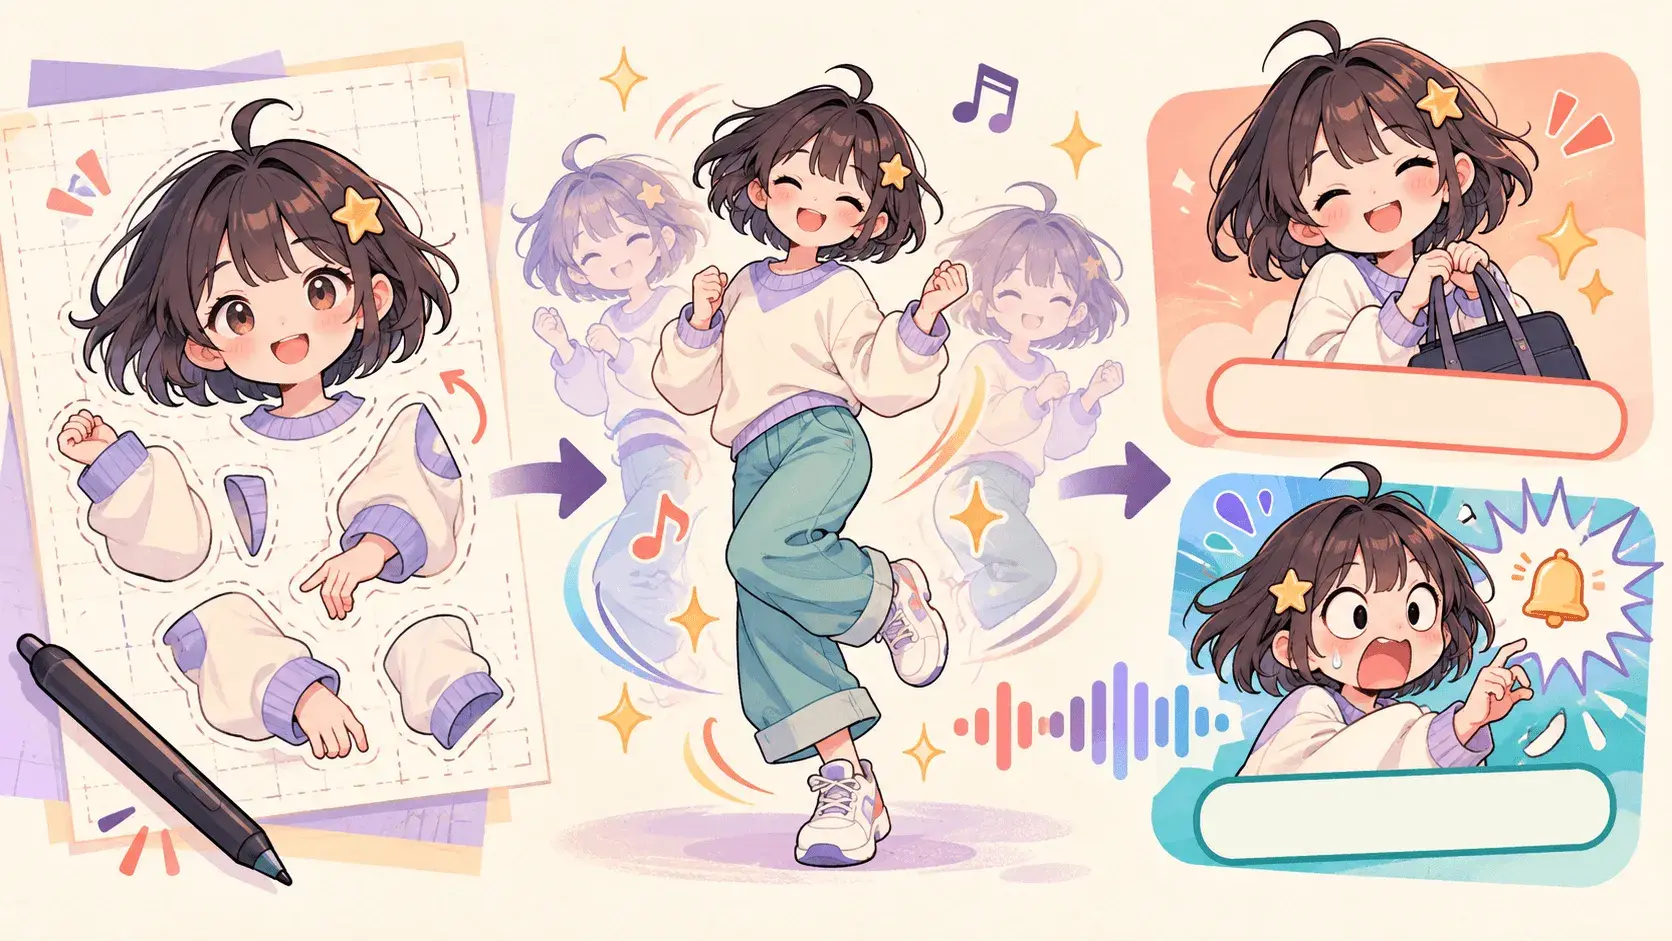
Do you want a character swaying to music and striking a cute pose, or an image with a caption that makes people say, “That's literally me”?

Both can be called meme videos, but they work differently. One uses character motion and musical rhythm; the other uses a situation, a reaction, and a reversal to create recognition or a joke. Choose the format first so you do not spend hours animating something that misses your original idea.
This guide to how to make a meme video covers three workflows: animating character parts by hand, planning and generating AI animation with SoulVid, and making image-and-caption reaction memes with AI. The first two use the same hypothetical example so you can compare what each approach involves.
What is a meme video? Start with two different formats
Animation memes: character movement set to music
In some animation and music communities, an animation meme combines swaying, head tilts, hand gestures, and expression changes with a short musical phrase. It does not have to tell a joke. It can simply be cute, exaggerated, or satisfying to replay.
One technique separates an illustration into parts such as the head, body, arms, and hair, then animates their position and rotation. This animator's production journal shows the thinking behind that kind of cutout animation.
Our example is an original short-haired character with a star-shaped hair clip. Facing the camera, the character sways left and right, then raises one hand and holds a happy pose. This is a planning example, not a completed production test.
Reaction memes: images, captions, and a recognizable punchline
The other format is closer to a captioned reaction meme: a familiar situation paired with an exaggerated response, text, or sound effect.
For example: “You think you can leave work on time—then a meeting notification arrives.” Two reaction images may be enough. You could also add a brief turn, a freeze, or a change in gaze. The joke comes from the broken expectation, not the amount of animation.
These formats can overlap. A dancing character might deliver a punchline, and a still reaction image might interrupt an animation. The distinction here helps you choose a production method.
Which of the three workflows should you choose?
| Workflow | Best suited to | Main work |
|---|---|---|
| Handmade animation meme | Precise control over artwork, poses, and musical timing | Separate parts, set pivots, animate keyframes, align audio |
| AI animation meme | Trying character motion and visual variations through prompts | Prepare references, describe actions, plan shots, generate and select |
| AI reaction meme | Relatable situations, reactions, and punchlines | Develop the joke, create expressions, edit captions and pauses |
Method 1: Make an animation meme by hand

Step 1: Choose a musical phrase and a short action sequence
Pick the section you want to use and listen for its accents and ending. Start with one complete movement sequence rather than an entire song.
For the star-clip character, decide where “sway left,” “sway right,” and “raise hand and hold” belong before drawing. Place those action notes next to your audio markers so the number of poses fits the phrase.
Step 2: Simplify the movement and test a rough version
Use simple shapes for the head, body, and arms to block out the main poses. Detailed eyes, hair strands, and clothing shadows can wait; the movement needs to read clearly first.
Place the rough artwork in an editor that supports audio and keyframes. Is the sway too fast? Is the hand gesture readable? Does the final pose stay on screen long enough?
If a front-facing upper-body shot communicates the idea, leave out turns, running, and complicated footwork. A clear scope makes the required artwork easier to estimate.
Step 3: Finish the artwork and separate the moving parts
Once the rough version works, prepare the finished illustration. Put the head, torso, arms, front hair, and any other independently moving elements on separate layers.
Consider what movement reveals. Raising an arm should not expose a hole in the shirt, and a head tilt needs enough overlap around the neck.
You do not have to separate every detail. Separate what this video actually needs, and give the layers clear names so revisions stay manageable.
Step 4: Set pivots and animate with keyframes
Import the parts into your animation or compositing tool and set their rotation pivots. An arm should rotate around a shoulder or elbow rather than the center of its image.
Set position and rotation keyframes for the main poses. Start with the body's sway, add a small head tilt, then work on the hand gesture and expression. Adding motion in stages makes problems easier to identify.
Adjust movement speed and pauses for a bouncy feel, or hold a pose when it needs to read clearly. The character does not have to glide at a constant speed throughout.
Step 5: Add a background, text, and a few effects
Use a simple background to check the silhouette before introducing colors, shapes, or short text. Effects should help viewers see the action rather than cover the hands.
For example, keep the background steady during the sways, then introduce a star shape at the final pose. That gives the ending a focal point without a pile of transitions.
Step 6: Check the musical timing and loop
Replay the video several times to check the relationship between motion, sound effects, and music. For a loop, also inspect the jump from the final frame to the first.
You can return to a pose close to the starting one or cut back on a clear musical accent. Judge the result by watching it play.
Method 2: Make AI animation memes with SoulVid
The AI workflow still needs decisions about music, character, action, and pacing. References and written directions replace some drawing and motion prototyping. This helps you explore options, but it is not a precise cutout-animation controller.
Step 1: Keep the same character and describe the action order
Turn the handmade example into a short brief: who appears, how the camera frames them, what they do, and which pose ends the clip.
Instead of “make a cute meme,” try this starting prompt:
Create a bright, simple 2D animation-meme character clip. Use the short-haired character in the reference image, keeping the same star-shaped hair clip, clothing, and colors. Fixed front-facing upper-body framing. The character gently sways left, then right, raises one hand, smiles happily, and briefly holds the pose. Keep the background simple. Do not add other characters or text. Prioritize readable poses and small movements.This describes a target, not a guaranteed result. If the sequence is unstable, test the sway first and handle the ending separately.
Step 2: Give SoulVid the idea and character references
If you have artwork, provide it with notes about style, framing, background, and motion. If you are starting from a character idea, confirm the character assets before moving to video generation.
Keep the scope explicit: a short character action rather than a full story or a music video with changing locations. If you already have music, identify the section and its main timing cues.
Step 3: Review the summary, details, and character assets
Use the Summary, Details, and Assets stages to check the direction:
- Does the summary still describe this one short sequence?
- Do the details preserve the front-facing framing, outfit, and colors?
- Do the assets match the intended hair clip, hairstyle, and expression?
- Have unnecessary characters, plot, or complex backgrounds appeared?
Correct a drifting direction before generating more. Additional clips usually will not fix an unclear brief.
Step 4: Organize the action in a short storyboard
At the Storyboard stage, give each action a purpose. This planning example does not mean every pose needs a separate video:
| Action | Purpose | What to check |
|---|---|---|
| Front-facing ready pose | Introduce the character | Clear design and framing |
| Left-and-right sway | Establish repeated motion | Stable body, head, and hands |
| Raised-hand hold | Create a memorable ending | Readable gesture and expression |
If you need multiple clips, plan their joins. Independently generated clips may not connect seamlessly; decide where cuts or holds can help. See the AI storyboard guide for a fuller planning process.
Step 5: Generate a short clip and revise weak parts
Generate the most representative section first. Check the face, hands, clothes, and movement direction. Does the star clip disappear? Does the character turn unexpectedly? Does the camera move closer on its own?
Revise the prompt, assets, or storyboard when needed. A simpler shot with fewer actions makes it easier to identify what went wrong.
AI motion may miss a beat or produce a different pose on another attempt. If a gesture must land on a specific frame, handmade keyframes or later editing are better suited to that level of control.
Step 6: Finish the music, text, and loop
Once the footage is usable, trim it, align the music, and add text as needed. Describing a musical mood during generation is not the same as finishing exact beat synchronization.
If the clip does not loop well, give it a clear beginning and ending instead. You can also insert still artwork when a fixed pose matters.
Handmade animation lets you adjust individual parts; AI animation progresses through prompts, references, and selecting results. Choose based on whether precise control or trying visual options matters more.
Method 3: Make image-and-caption reaction memes with AI
This workflow does not require a dancing character. Two expressive images can make a complete meme when the situation is clear and the reversal arrives at the right moment.

We will use the hypothetical “leaving work on time, then receiving a meeting notification” example.
Step 1: Write the situation, expectation, and reversal
Reduce the idea to three beats:
- Situation: it is almost closing time, and the character packs a bag.
- Expectation: today they can finally leave on time.
- Reversal: a notification sounds, and their smile freezes.
Avoid extra relationships and backstory at first. Viewers should quickly understand what was expected and what happened instead.
Step 2: Use AI to develop joke and caption options
Ask AI for several reversals around the same situation, then select the one that fits your audience. You can also use SoulVid's initial conversation to develop the video direction.
Turn “I think I can leave work on time, then a meeting notification arrives” into three short meme-video concepts: one relatable, one with an exaggerated reaction, and one absurd. Each concept should contain only a situation, expectation, and reversal, with at most three shots. Keep captions short, do not reveal the punchline in the first shot, and list the character expression needed for each shot.Judge whether the idea works visually as well as in writing. If the reversal needs a paragraph of explanation, simplify it.
Step 3: Prepare the character and reaction assets in SoulVid
Turn the selected joke into a brief. Specify the same character, outfit, and similar framing across the reactions.
The office example may only need a relaxed smile and a blank, defeated stare. If still images communicate it, confirm the character and expression assets without adding walking, turns, or broad movements.
For an animated reaction, describe a specific action: “The character stops packing, glances toward a notification, and their smile slowly freezes.” One clear reaction is more useful than several unrelated movements.
Step 4: Review the setup and reversal before generating
Check the “expectation → realization → reaction” order in the summary and storyboard.
| Shot | Information | Asset plan |
|---|---|---|
| Smiling while packing | The character expects to leave | Happy still or short movement |
| Stopping at a notification | The expectation is interrupted | Notification sound and a pause |
| Staring blankly | The reversal and relatable reaction | Reaction image or clip with the final caption |
Add readable notification text during editing instead of relying on AI to generate tiny words on a phone screen. Let the image establish the reaction first.
Step 5: Finish the joke with captions, sound, and pauses
Watch the footage without captions to check that the reaction reads, then add the context viewers need.
The first shot might say “Finally leaving on time.” After the notification and a brief pause, show “Just a quick meeting before you go.” Do not show both lines together: viewers would read the reversal too early.
Use the notification sound to trigger the event, and add other sounds only when they improve the response. Ask someone who has not heard the joke to watch it once; they may spot confusing moments you have stopped noticing.
Turn an everyday situation into a character reaction clip
Start with one character, one expectation, and one reversal. Use SoulVid to plan the assets and storyboard for your first AI meme.
Start creating with SoulVidWhat to fix when a meme video does not work
The motion misses the music
For handmade animation, adjust the main pose timings before refining the movement between them. For AI footage, select usable sections and adjust the cuts in editing. Repeating “perfect beat sync” in a prompt does not guarantee the problem will disappear.
The AI changes the face or outfit
Check the clarity of the reference, the complexity of the action, and any unnecessary turns or occlusions. See how to keep characters consistent in AI video for more techniques.
Viewers do not understand the punchline
Remove shots that do not affect the outcome and shorten captions. Viewers need to understand the initial expectation before they can recognize its reversal. If the first line already reveals the ending, the reaction loses its job.
The loop jumps awkwardly
Compare the opening and closing poses, positions, and backgrounds. Move the cut or redesign the ending if they differ too much. A loop is optional; a clear freeze-frame ending also works.
Meme video FAQ
Can I make animation memes without drawing?
You can start from prepared character references or AI assets and try simple motion. Handmade cutout animation still requires layer, pivot, and movement work; AI requires clear direction and review.
Can I make one on a phone?
A basic image-and-caption version can be made in a mobile editor that supports images, audio, and text. For multiple parts and complex keyframes, check that your chosen tool has the required functions.
Can I start for free?
That depends on your assets, editor, and AI service. Check generation allowances, export restrictions, and watermarks. SoulVid's current options are on the pricing page.
Can AI create movement precisely timed to music?
You can provide musical direction and action requirements, but do not assume generated footage is already aligned beat by beat or frame by frame. Keep editing and manual adjustments in the workflow when timing must be exact.
Can a meme use only images and captions?
Yes. In reaction memes, expressions, caption order, and the timing of the reversal can matter more than continuous motion. Test the joke with stills before adding animation.
Can I use music and characters from a reference?
Studying a production method and reusing someone else's assets are different things. Use your own characters and audio for a demonstration, or check the relevant permissions for third-party materials. You can replace this article's character and office scenario with your own designs.
Finish one short video to find your preferred method
Choose handmade animation when you want to control individual parts and poses. Use SoulVid to organize ideas, assets, and storyboards when you want to test AI character motion and visual options. For a relatable reaction meme, clarify the situation, expectation, and reversal first.
Your first video does not need complex choreography, elaborate effects, and multiple jokes. One character with one readable action—or one understandable reversal—is enough to start testing. Add detail after you discover what actually needs improving.